まるむしアンテナの「****メモ」というカテゴリー記事は覚え書き用なので、
コマンドだろうがソースコードだろうがベタ張りだったのだが、
自分でもコード再利用する際に不自由を感じるので、これらを綺麗に表示できるプラグインを探してみた。
Crayon Syntax Highlighter
構文複数の言語、テーマ、フォント、URLからのハイライト、または投稿テキストをサポートするハイライター。
厳選した訳ではないのでオススメという訳ではないが人気はあるようだ。

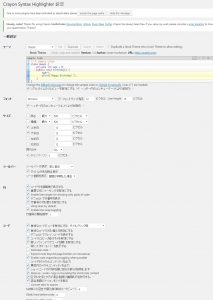
設定画面はこんな感じ。
特に不都合無ければ初期設定のままで良さそうだ。

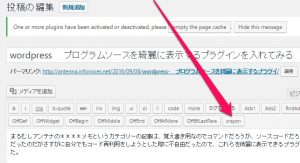
導入するとテキストモード時の編集メニューに【crayon】のアイコンが現れる。
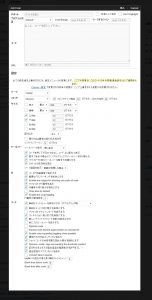
クリックすると挿入するコードの編集画面が表示される。

ポップアップで表示される。
基本はコードを入れて挿入ボタンを押せば良い。
Javascriptを表示してみた。
  // BUTTON PUBLIC CLASS DEFINITION
  // ==============================

  var Button = function (element, options) {
    this.$element  = $(element)
    this.options   = $.extend({}, Button.DEFAULTS, options)
    this.isLoading = false
  }

  Button.VERSION  = '3.3.5'

  Button.DEFAULTS = {
    loadingText: 'loading...'
  }

  Button.prototype.setState = function (state) {
    var d    = 'disabled'
    var $el  = this.$element
    var val  = $el.is('input') ? 'val' : 'html'
    var data = $el.data()

    state += 'Text'

    if (data.resetText == null) $el.data('resetText', $el[val]())

    // push to event loop to allow forms to submit
    setTimeout($.proxy(function () {
      $el[val](data[state] == null ? this.options[state] : data[state])

      if (state == 'loadingText') {
        this.isLoading = true
        $el.addClass(d).attr(d, d)
      } else if (this.isLoading) {
        this.isLoading = false
        $el.removeClass(d).removeAttr(d)
      }
    }, this), 0)
  }
こちらは、Arduinoのサンプルスケッチだ。
/*
  Blink
  Turns on an LED on for one second, then off for one second, repeatedly.

  Most Arduinos have an on-board LED you can control. On the Uno and
  Leonardo, it is attached to digital pin 13. If you're unsure what
  pin the on-board LED is connected to on your Arduino model, check
  the documentation at http://www.arduino.cc

  This example code is in the public domain.

  modified 8 May 2014
  by Scott Fitzgerald
 */


// the setup function runs once when you press reset or power the board
void setup() {
  // initialize digital pin 13 as an output.
  pinMode(13, OUTPUT);
}

// the loop function runs over and over again forever
void loop() {
  digitalWrite(13, HIGH);   // turn the LED on (HIGH is the voltage level)
  delay(1000);              // wait for a second
  digitalWrite(13, LOW);    // turn the LED off by making the voltage LOW
  delay(1000);              // wait for a second
}
数多くの言語を自動判定して装飾してくれるらしい。
なかなか便利だね。不都合が見つかるまで使ってみます。


コメント